Han Solo Cosplay Tutorial: Han’s Belt Buckles and Accessories (Part 3 of 3)

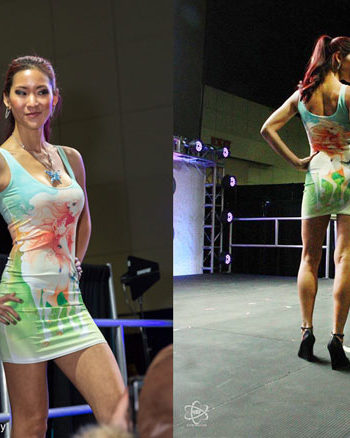
Photo by three mirrors. Copyright © 2012.
where can i buy ivermectin *NOTE* To skip to other tutorials for this cosplay, check out the links below!
Pants and Shirt
Vest
Holster and Belt
Woo hoo! The last of my Han Solo cosplay tutorials! This post will cover adding the rivets on to the belt and holster as well as the hardware accessories, including the gun.
Kakuda The Rivets:
Now that most of the leather work was done, it was a matter of adding all the rivets. In order to do this, you will need a few key tools such as a leather hole puncher, rivet setters, a mallet, and of course rivets. Rivets are great because they really secure everything together and you can pretty much count on your leather not ripping or threads falling out. It was surprisingly easy considering I had never done this before.
- First I marked where I wanted the rivets to go with white chalk
- Then I punched the holes
- Next I inserted the rivets through the holes
- Then I placed them over the proper sized anvil and used a mallet on top of the proper sized rivet tool to secure them! Easy, right?
I added two to each side of the “Y” piece in order to secure the leather to the silver “seatbelt” pieces, and also used them to attach the gun holster to the “Y” shape.


 The Hardware:
Although I would have ideally liked to figure out how to make all the belt buckles and attachments in some sort of metal, I decided to make them out of FIMO for the sake of time and money. FIMO, which very similar to Sculpey, is a polymer clay that you can sculpt and then bake in the oven. Baking it results in a very hard, somewhat sturdy object that ends up feeling like plastic. I decided on FIMO versus Sculpey only because it came in this metallic silver color, which I thought would be perfect for the belt buckles. I had never used polymer clay before. so this was definitely a learning experience!
I started by cutting some templates of the belt buckles – one for the front and one for the back. Keep in mind that the front and back buckle should be made proportional to your brown belt and the size of your body. Below is the shape of Han’s back buckle. Note, templates should made on plain paper since the ink from the paper will rub off onto the clay!

In order to actually attach them to the belt, I decided to use a large metal frame hanger hook and bent it so that the buckle would hook onto the belt. I inserted these pieces into the clay before baking so that they would bake into the clay. Although they seem pretty sturdy, they can be easily ripped out so I tried to reinforce everything by adding some extra clay on top.
 Below is the hexagon like shape I used for the front buckle. I had initially wanted to use the side pieces and have the belt loop through those, but I ended up removing those since they looked so awful. Since I had already baked everything, I wasn’t able to attach a metal clip to this one and ended up using velcro to attach this buckle to my belt. Although velcro can be secure, it needs reinforcement especially since you’re moving around and bumping into a lot of people at cons. And I definitely learned the hard way since on day 3, I lost my front buckle! FAIL. Lesson learned – always bring extra accessory pieces in case you lose something or something breaks. Wearing your cosplay around the house is a lot less wear and tear than wearing it at a con!
 For the two “seatbelt” shaped attachments, one would need to attach under the front buckle, and one would attach behind the back buckle. I found some other frame hanging screws and decided to also bake these into the “seatbelt” pieces and then use nuts and bolts to fasten them to the belt.
Here you can see the back of the “seatbelt” pieces. I tried to reinforce the corners since my first batch actually ended up breaking due to the weight of the gun. This second batch below had a much thinner opening for the leather and much thicker edges.
 And here is the front where you can see the nuts and bolts holding in the frame screws. Each one attaches behind the front and back buckle. Unfortunately by day 3 of the con, my front seatbelt piece broke so I’m hoping to upgrade these to something more sturdy for next time.
Other accessories:
For the gun, I purchased a vintage 1978 Han Solo blaster from eBay and painted the handle and blaster tip with acrylic paint. I used a basic brown for the handle and mixed a silver with some black for the blaster tip.

So the last thing I did was make two accessories for the belt – the droid caller (the cylindrical object) and the round object on the right side (no idea what that’s called). The round object was the easiest – I took a cap from a water bottle, used my leather hole puncher to add a bunch of holes, and painted it all silver.

For the droid caller, I went to Home Depot and just looked around to see what I could put together. I ended up finding two PVC pipe pieces and glued those together. I also found this random silver piece in the electrical aisle that I could screw into one of the pipes. And in the same aisle, I found this sort of C shaped object that held the 1″ pipe in perfectly! Although I know the droid caller is supposed to sit on the belt, it made sense for me to bolt it down through one of the holes on the belt so it actually hangs below the belt.
Here are the PVC pipes after gluing them together and painting them black.

Here’s the mounting of the Droid Caller. For the buttons on the Droid Caller, I molded those in FIMO and glued them on. I also glued a piece on the bottom of the Droid Caller so that it had a base and wasn’t entirely hollow.
 And that’s it! Phew! Looking back, it was a lot of work and pretty challenging for a somewhat simple looking costume, but I loved wearing it and will definitely wear it again. May the force be with you!

14 Comments
amandafemguitar
I love this! And I linked to you on my blog, The Geekly Tribune.
http://geeklytribune.wordpress.com/2012/10/25/gals-as-guys-gender-bending-cosplay/
emilyo
Thanks! I will definitely check out your blog as well!
Sherri
Thank you so much for this tutorial! My husband and I are doing gender-swapped Han and Leia for Dragon Con this year, and these posts have been an invaluable resource. I really appreciate all the details you’ve included.
emilyo
Awesome! That’s great to hear and I’m so glad you found my write up helpful! I would love to see how your cosplays come out as well – feel free to share something on my Facebook page. :)
Tayvia
First off, I love your site and I think all of your creations are incredibly creative! I’m making a Han Solo costume with my boyfriend and I had no where to even begin. All of the images of him are so blurry! For the blaster holster did you use an up-cycled coat? Anyways, thank you. Your trials and tribulations will definately us to make the ultimate Han Solo costume! THANK YOU!
emilyo
AW, thanks! Not sure what you mean by an “up-cycled coat”. Everything was just made of leather pieces and held together by stitching or rivets.
http://www.thestylishgeek.com/2012/07/21/han-solo-holster-pattern/
Tayvia
definitely *help*
giulia
Thank you so much for this tutorial!
I decided to be Han for halloween because I refuse to buy another costume and this tutorial helped me so much with all the small details that I had to add to my already existing pieces.
I can’t wait to show it off at the parties, and any possible future cons I go to!
emilyo
awesome!
Minigrip
Hey Emily, how much did it cost you to make this costume in total? I love love love the authenticity, but I’m on a budget :(
emilyo
Sorry, I don’t know exact numbers, but I would guess around $100.
Anonymous
Heyy! Greetings from Finland. We have a costumeparty coming up and i’m following this guide try to make my costume. The shirt and other clothing are pretty much finished but having a little trouble to get the leather for the holster.. Well anyway the question is:
Did you use FIMO gray or silver with the belt buckles?
Thank you so much for this guide. =)
emilyo
I used a metallic gray. I don’t think it was silver since that might look too shiny. Good luck!
JJ
Thank you so much!, I went to the premier of The Force Awakens as Han Solo!, It was an awesome but bittersweet day! Greetings from Peru!